Little by little, my sale site, http://www.mrsdesigns.blogspot.com/, is up! I will always continue to list my inventory there, as long as I'm making new things, so check it out! And be sure to check back.
And if there's anything you see here, or anywhere, else, that you'd like me to make for you, just email me! I'm always open to custom orders and specialization. Can't wait to hear from you!
Wednesday, November 19, 2008
Friday, November 7, 2008
Creme and Green Tote
 Anybody know the difference between "cream" and "creme"? I'm too lazy to look it up right now. Anyway...
This is a lined tote bag I've made to sell at the craft show. There's nothing too special about it--it's just pretty. The green fabric was in my late grandmother's stash, and I probably have 4 yards or more of it. The creme colored stuff is something I found at WM for $1/yd. It's nice: light yellowish linen with white cotton strings woven thru it. (Just be careful not to pull the strings, or you'll have a run!) There will be a matching wallet for this, b/c it doesn't have any pockets.
This bag has a flat bottom, achieved by folding the corners in in triangles and securing them to the bottom of the bag. I really like the look of french seams, mainly b/c it resembles boning, which is nowhere to be found in my little town or the surrounding area. Gives it a nice, crisp look.
Not to stray too far from the original purpose of this blog, I'll add the cost to construct: about 50 cents, total, maybe less b/c there's quite a bit of the creme fabric leaft over, which is the only thing I spent money on for this project. It took about an hour to make, probably, maybe a little more.
Flat Bags
I am going to try my hand at selling some handmade things at a craft show the weekend of November 15th in Moberly, MO. My wares will include wallets, purses, bags, and a few baby bonnets. These are a few of the items I've made to sell. I'm calling them "flat bags" b/c that's exactly what they are. They are basically two panels of fabric with stabilizers in between, folded in half and sewn together at the edges, with pockets on the insides. The one with the square applique also has a pocket on the back of the outside. They are made of red corduroy and cotton fabric. There's one more in the works, but our camera is on the major fritz so I snap whenever it'll allow. .jpg)
This idea came out of necessity. I was always having to unload my wallet, notebook, phone, and a pen from the diaper bag whenever I left my daughter in the nursery or at home with my husband. So I made myself a large tote with lots of pockets for a diaper bag, but to avoid packing around a handful of loose things whenever I'm seperated from the babe I made a small, slim bag to fit inside of the big tote. (Someday I'll take pics of the ensemble and put them on here!) Now when I don't have/want the big bag with me, I just lift the small one out and go! While these bags aren't ideal for a load of stuff, they're perfect for smaller quantities. They fit into small places and the hard sides mean that you can put papers or paperback books inside and they won't get mangled. I love them!
Monday, October 20, 2008
Pink Hanging Organizer
This is another Christmas present, for another sister. (Same sister as the teddy bear wallet below.) It does not have straps on the back to roll it up with, like the blue one does. 


That little thing in the second pocket is a drawstring bag. I trimmed it with red ribbon. Everything I used came from the estate auction and was insanely cheap.
This is a matching snap closure bag. It was the first of its kind, so It wasn't perfect.
The inside of the little bag. Trimmed with creme ribbon.
All the ribbon and fabric came from the auction, so the total cost was pennies and time. But I'm very happy with how these turned out.
Honestly, you could make one of these at home using things you already have. A bedsheet or towel makes a perfect back panel, and you can use anything for the pockets that will give you enough material: men's shirts, pillowcases, pieces of a sheet, towels, tableclothes.... I could go on. Go thru your Goodwill box. You're likely to find a hanging organizer in there! :D
Blue Hanging Organizer and Matching Snap Bags


I got this idea from ReadyMade Magazine. The organizer is very very easy to make--just sew smaller rectangles of fabric onto one large rectangle. They say to use grommets to hang over door hooks, but I just made loops out of the fabric that I used for the organizer. For this one, I added a strap and handles on the back so that you can roll it up, secure it, and take it with you. Then I made matching small bags with snaps for further organization. Love it! This is a Christmas present for one of my sisters. I bought nothing new to make this--it was all stuff I had on hand. I think that most of the fabric came from an estate auction where I got a ton of stuff for $7, so the total cost, literally, was pennies. And time, of course, but it's not as time consuming as you'd think.
Teddy Bear Wallet
When my family came to visit a few weeks ago, one of my sisters saw a little makeup bag I'd made for myself and loved it. It was basically just like this, but with snap closures. She said, in a hinting way, "I'll have to have you make me one of those sometime..." So I did. And I'm not even waiting till Christmas to send it to her, b/c I've already made her one that matches the hanging organizer that I made her for her present (sshhh, don't tell!).

I hate this fabric--I'm not a stuffed animal fan (sister definitely is!). I had just enough to do something small with it, and she is the only person I can comfortably unload it on. :)
The fabric and the bottons came as part of a large load of sewing and crafting stuff that I got for $7 at an estate auction, so we'll call it all 15 cents, even tho it probably didn't even come to that. Under each button is a velcro circle, which were 16 sets for $2 at WM, so about 13 cents.
Grand total = under 30 cents!

Tuesday, August 12, 2008
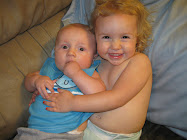
Gender-Neutral Baby Bonnets
This is a very easy, classic style cap. I made them for a lady who is expecting to give many baby gifts in the near future, but doesn't know the sexes yet.  For all of them, I used white polar fleece. It's incredibly easy to work with, doesn't require hemming (just be very careful when trimming your edges), and is very soft for next to baby's skin. These are sized for newborn - 6 mos, according to the pattern I used (a very old pattern my mom gave to me).
 I used a blanket stitch around the face for all three bonnets, then embellished each with a unique touch. I didn't have enough fleece to make the top of the brown bonnet out of one piece, so I continued up the middle with the stitch to cover the seem. (The tops of the other two are one piece.)
 On the back of the brown one, I stitched a line of "x"s. The tie is a brown ribbon.
 The green one is probably my favorite. Again, blanket stitch around the face, green ribbon tie...
 Then two little red starbursts on the back by the neckline. Kind of Christmas-y. They are, after all, cold-weather hats!
 The yellow one is very cute, too. Again with the blanket stitch, and then a zig-zig embroidered around the back. There is a small bow tie in the front of this one, b/c I didn't have a thread long enough for the blanket stitch around the face. This is where the two threads came together (exact middle).
 For all of them, I used white polar fleece. It's incredibly easy to work with, doesn't require hemming (just be very careful when trimming your edges), and is very soft for next to baby's skin. These are sized for newborn - 6 mos, according to the pattern I used (a very old pattern my mom gave to me).
 I used a blanket stitch around the face for all three bonnets, then embellished each with a unique touch. I didn't have enough fleece to make the top of the brown bonnet out of one piece, so I continued up the middle with the stitch to cover the seem. (The tops of the other two are one piece.)
 On the back of the brown one, I stitched a line of "x"s. The tie is a brown ribbon.
 The green one is probably my favorite. Again, blanket stitch around the face, green ribbon tie...
 Then two little red starbursts on the back by the neckline. Kind of Christmas-y. They are, after all, cold-weather hats!The yellow one is very cute, too. Again with the blanket stitch, and then a zig-zig embroidered around the back. There is a small bow tie in the front of this one, b/c I didn't have a thread long enough for the blanket stitch around the face. This is where the two threads came together (exact middle).
 (That's my 13 m/o daughter's pudgy hand, which she is unable to keep off of anything these days!) And a yellow ribbon tie.
Fleece at my local WM is $4.44/yd. Ouch if you're making a blanket, but bearable if you're buying smaller pieces. It is 60" width, tho, so that makes it better. And the embroidery floss I used was 10-20 cents each. All three of these bonnets used most of the 1/4 yd and quite a bit of floss.
Tuesday, June 10, 2008
Rhyl's "New" Orange Dress

 (BTW, my daughter's name is pronounced "Rill", like Bill, Phil, or Jill, not "Ryle". It came from our Australian friends. It is also a town in Wales.)
While packing up our clothes to move to our new house, my husband Nick and I had the normal three boxes: winter clothes and things we can't wear at the moment but want to keep, clothes we're packing up to put directly into the closet when we get to the house, and the goodwill box. I'm all for purging and making a new beginning with our new place, but when he put this organge button-down shirt into the box, my eyes must have really sparkled! I thought about it for a few days, then ran up this little number for Rhyl on my sewing machine.
I didn't have a pattern, but I eyeballed a top that fits her pretty well and made it about the same size. Then I embroidered a butterfly (I got the idea for the outline of the butterfly off our toilet paper--lol) in red, orange, and yellow floss on the front to make it a little more feminine. Three buttons close the back, which came off the shirt.
For not having a pattern, this dress was incredibly easy. I made the top like any basic dress or shirt top (made out of the top and sleeves of Nick's shirt--had to have two layers b/c it's lined). Then I took the hem off the bottom of the shirt for the waistband. I gathered and attached a rectangle of fabric (the bottom half of the front and back of the shirt) for the skirt to the waistband and then stitched that to the top. It's loose enough to give her some room to move in, but doesn't look sloppy. She needed some more every-day clothes to run around in and get dirty, and this is perfect b/c it's an old shirt, and free! And a little sentimental b/c it's one of Daddy's old favorites. I'm happy with it!
Cost: Free! or one old shirt
Monday, June 9, 2008
Brown and Khaki Tote


I just can't get enough of this khaki canvas material! It makes the perfect bag! But now I don't have much left. And I like this retro material, too, which is literally decades old and in perfect shape. True vintage! I love it!
The material was free and I didn't embellish the bag or put any closures on it, so the cost of the whole thing cost just a couple of yards of thread! (Btw, I get spools of 1000 yds/$1 usually, which is why I don't include the cost of thread. If you want to factor it in, just add a couple of cents to the total.) If the material weren't free, it would have cost about a yard of material total, maybe a little less. I forgot to take a picture of the inside, but it's lined with the brown material (same as the handles) and has one khaki inside pocket. It's just a regular tote, but I've been meaning to make one to take to the grocery store. I think the handles will make it stronger, too. They certainly won't be coming off any time soon!
Brown "Smocked" Top

Hmm, I'm really not sure what to call it. Before I found out that with the use of elastic thread I could do real smocking on my sewing machine, I experimented with this method. I took 1/4" elastic, stretched it along the fabric, and stitched rows to it. It turned out okay. But then, yesterday in WM, I discovered the better way to do it, and that I should be able to do it with my sewing machine, and I'm really excited but a little disappointed with the waste of fabric. Well, it's wearable, so I guess it's not a total "waste"!
I have 4 or 5 yards of this fabric. My mom found it in a box of my grandmother's old stuff. I'm excited to have it--it's very retro! I want to make a dress out of it, which is what this was supposed to be but it wasn't full enough around my hips, so it got shortened into a shirt. It has wide straps that are gathered in the front. The cost of the elastic is $1.18/8 yds, and I used about 3 1/3 yds, so about $.53 in elastic was my cost.
Saturday, June 7, 2008
Simple Paisley Skirt


This is perhaps the quickest, easiest, and most cost-effective sewing project imaginable for a woman. This is two trapezoids of fabric stitched together at the sides, hemmed at the bottom, with an elastic waistband. A drawstring waist would work really well, too, and be just as easy. Just make it according to your waist and hip measurements and however long you want it. And really, if you are patient with your stitches and don't make them too long, you don't even need a sewing machine. The trapezoid shape makes the hem come to two corners. If you wanted a regular hemline, make it a smiley face! There are endless possibilities for the hem...
I adore this fabric. I found it on clearance a few years ago at WM for $1/yd, and this was one of my first sewing projects ever! I've been wearing this skirt since I had the baby, which was almost a year ago. It took most of the yard--we'll call it 2/3. And 1/8" elastic is $1.18/8 yards, and I used about 2/3 yd, so...
Material $.67
Elastic $.11
___________
Total approximately $.78
Blue Silky Dress


For this dress, I used the same pattern as for the blue and white paisley dress. I got the fabric, which is a very lightweight silky synthetic, from the SA for $1/2yds. I trimmed it with some really cheap lace and implemented a purple sash around the waist which I made from some leftover WM clearance stuff. (It's not enough to count for anything, but we'll pretend it is in the cost tally.) I don't typically like emphasis on the natural waist line for myself, but this turned out pretty good. The only problem is that the fabric is thin, so I'm going to have to make a slip to wear under it. The top is lined, so no peeking there! :)
Material $1
Lace $.10
Sash $.25
__________
Total $1.35
Large Khaki Hobo Bag
I really like the small one I made, but it's purse-sized and let's face it: I have an 11 m/o. I carry around diapers, wipes, extra clothes, toys, and snacks, and all the baby's stuff, too! :D But seriously, I needed more room, so I made a large one. And it is LARGE! (Look! It's bigger than the baby!! lol)


I used a heavy khaki material for the outside and a very bright flowery watercolor-ish print for the lining. I put two khaki pockets on the inside, and rather than finish all the edges, I used an overcasting stitch close to the edge so that it'll fray just a bit, which I thought would give it a summery, hobo-ish look (the tops of the pockets are the selvage and won't fray).
The outside is pretty plain, so I dressed it up a little with a dangling bead string. I had a few big glass beads of the same color scheme, and I threaded them on a hemp line and tied it to the handle. Then I strung some tiny pink beads and wrapped them around the hemp for a little more color. I still think it's pretty plain, and I'm considering cutting out a flower from the leftover lining fabric and stitching it to the outside corner, like a patch. I think that would finish it nicely.
I have not put a clasp on it yet. It's been perfectly functional without one and the mouth of the bag is so big that if it turned over, a zipper would be the only thing that would keep everything from falling out, and I don't plan to install a zipper. I might put a tie of some sort on it, but I might just leave it as it is. 
All the material for this bag was given to me free of charge, as were the beads and hemp cord. It took a little less than a yard of fabric to make, combined. It was free for me to make b/c I used what I had, but if I had to buy it all, I wouldn't have spent more than $3-4 on all the materials, and that's a high estimate, for how I shop.
Tuesday, June 3, 2008
Yellow Gingham Swimsuit Cover
 In further preparation for our upcoming camping trip, I put together a swimsuit cover today. It could also be worn as a skirt, but would need a slip underneath b/c it's very thin. This is clearance $1/yd fabric at WM, and I used about half the yard. Also used roughly a yard of my cheap lace to trim it.
It was exactly as easy at it looks. A couple of hems, a drawstring that I made from the same fabric, and some lace around the bottom. The "hardest" part was gathering the bottom part to fit the ungathered top part, but that's not so hard as it is just a pain in the butt.
It's a nice addition to my camping wardrobe, something to lounge around in between dips in the lake and to keep the booty covered while I chase around the baby. And if it gets messed up, hey, it cost only about $.65!
Yellow Swimsuit Bottoms
 These aren't necessarily meant to partner the black top (I made matching black bottoms for that). My family has a big camping trip coming up and I'm predicting that I'll be in a swimsuit most of the day for about 4 days. I'm a big fan of clean bottoms so I'm taking more than one!
This was the remainder of a $.25 SA pillow case (remember the yellow inset of the blue plaid top?). I cut out two pieces of the fabric so that I'd have double-thickness (it was a tiny bit thinner than I'd like). Then I used the leftover scraps to braid a belt to go around the waist to hide the edge of the suit (part of the waist was the hem of the pillowcase that I couldn't easily take apart). That also meant that I didn't have to finish the edge of the waist, saving me time and thread on that. I hate to waist anything, and these bottoms used almost exactly the whole amount of fabric I had. I stiched the braid to the waist, and there it is!
Cost: $.25
Sunday, June 1, 2008
Hobo Bag


I used some of the free fabric that my husband's grandmother gave me to make this little purse. It's striped canvas, and I didn't use a pattern, just freehanded it. I cut out squares of fabric for the body and a long rectangle for the handle. It has yellow lining (also Grandma's free fabric) and two inside pockets made out of the striped fabric. The button closure was the extra button that came with a pair of pants, and I haven't decided yet if I'm going to add any other embellishments. It's all earthy tones, and I have some vintage-looking brown beads, but I'm going to wait to be inspired and see what happens. This all took about an hour to make, and maybe a yard of fabric in total, lining and all.
Cost: Free! If I had had to buy the fabric and button, I still wouldn't have spent more than $1.50 on supplies. This is exciting to me, as I don't have a good history with making purses (this is only my second attempt, the first didn't go so well) but I HATE paying for them. Even WM prices for purses make me cringe. I know. I'm cheap. But that's who I am...
Also, I don't buy trendy things, so it's great that I have a cute trendy piece for the price of a few yards of thread.
Friday, May 30, 2008
Homemade Swimsuit Top
 Since I got pregnant, have been nursing for almost a year, and lost 20 lbs (not counting the baby weight), my boobs just aren't what and where they used to be! But, perky or not, it is that time of year again--swimsuit season! (Here's where I give a shreek that would wake the dead!) I searched high and low for a top that would put the girls back where they should be, but nothing would work. I have spent hours pouring over Victoria Secret catalogs and quite a while in WM trying on every different style imaginable with no success. So I went with my first instinct--I'll make one!
I had a bra that I never wear anymore b/c the nipples started poking out, and to alter it would make it ugly. So it's been in my drawer for a few years, waiting for... I don't know... a miracle, I guess. But since I was going to put a new face on it, it didn't matter how ugly or rough the cups would be. So I nixed the cone look by redoing the darts and cut out two pieces of fabric. The first was shaped to cover the sides and in between the cups. I stitched it onto the bra around the cups and sides. The second piece was a rectangle, which I gathered in the middle and on the sides. I pulled the middle gather tight, and the end gathers to fit the sides of the bra. I stictched it all together, and here it is! My very own, super cheap, push-up swim suit top! (Not a great pic, I know, but I wasn't going to make you suffer thru a picture of my modeling it!)
The other thing I think I'm going to do to it is make it into a convertible tankini by making the bottom part of a tank top and adding hooks to it, and thread loops to the inside of the top to attach it. This way, I can be covered on my fat days and bikini-clad on my confident days (the days when the pool is empty!).
I don't know what to put the cost of the bra at--I think it was about $12 new, but that was a long time ago. The material was WM clearance $1/yd, and I used less than 1/4 yd. But let's call it $.25. And that's it!
Wednesday, May 28, 2008
Purple Bedsheet Outfit

 My husband's grandmother recently gave me a bunch of fabric, and this nice, high thread-count lavendar bedsheet was in with it all. After dreaming about what I could do with all that free fabric, I finally settled on an experimental top (this was before I got a pattern for tops). I used a dress pattern that my mom had given me for the bodice, and I used my cheap lace to trim it up and make it extra dainty and flirty.
The top is my favorite. The skirt was an afterthought. Because I only had one zipper on hand and it was earmarked for a dress I made later, I decided to close the back with buttons. (This was the first time I've ever made buttonholes--another reason this was a satisfying project!) But I only had four buttons--free, given to me by my sister who had them left over from a dress she had me mend. I left the rest of the back open, and stitched a sash across the front to tie in the back. The ties hang down over the open part, so it isn't too noticeable, which I think makes it even flirtier! :) The skirt is a long piece of fabric that's been taken in (I don't know what they're called! like darts, but on the hips to form the waist) on each side. It's a simple wrap with a snap closure and lace trim.
So basically, everything but about 25 cents of lace for this outfit was free! But let's recap the costs as if it weren't...
Fabric at the SA would have been about $1.00
Buttons were 6 for $.67 (used 4)
Lace ~$.25
__________
Total ~$1.92
But better than the fact that this outfit was basically free is that I freehanded most of it, and it turned out wearable!!! Because I'm so new to sewing, and still figuring a lot of things out, this was a really amazing feeling!
Blue Plaid Pillowcase Top

I am so proud of this one! I did go ahead and get a pattern, which cost $2.44, but I plan to use it again and again this summer and in the future (it's also got a sleeved option for winter shirts!). I got two pillocases from the SA, 25 cents each, and used my cheap cheap lace, of which I have yards and yards, for the trim. I only used a small piece of the yellow case, leaving plenty for another top or something, but let's go ahead and assume the whole cost in the break-down Are you ready for this??
Fabric $.50
Lace about $.10
___________
That's right= less than 60 cents for this top! Not including the pattern, of course, but even if you do, could you have found it for $3?? I'm excited!
Monday, May 19, 2008
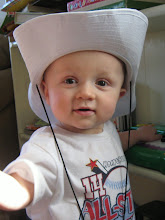
Another Bonnet


This time for a boy or a girl! The prototype, of course, is pretty girly, and my experimental fabric of choice continues to be purple gingham. I also added a little lace for trim. This is simply a square of fabric about 16" x 16", folded and stitched to make a box-ey hat. (The folds are simple, but kind of hard to explain.) I haven't, but I think I'm going to run a ribbon drawstring thru the back, both to tie it and to act as a gather so it contours to the baby's neck. Another option would be to put a dart in the middle of the back, and attach the strings to the corners. This would be a good winter bonnet, where the focus is more on warmth than on sun protection. (Of course, that's still important and many types of visors could be rigged up to the front if you wish.) For winter, a fleece or flannel would be perfect, and changing the color scheme and trim would make it good for a boy. Great gift for that "tbd" baby! :)
Materials
Fabric < $.15
Lace < $.10
Sunday, May 4, 2008
My Lovely Simplicity Dress!

I shop for stretch knits wherever and whenever I can, b/c they're very hard to find at a decent price. [Side note: why is there a wealth of tacky bright pink John Deere for girls linen at WM, but no lightweight, simple, cheap jersey t-shirt fabric??? anyway...] So when I was in a neighboring WM a few months ago I hit the clearance rack, which is usually where stretch knits are, and jackpot!! I got three or four different ones for $1/yd! So, I walked out with $12 in fabric, which would have been way too much for me had I not also walked out with 12 yds of stretch knit!
One of these fabrics stole my heart, right there in the WM aisle! :) It's blue and white paisley, and I had so many ideas for it. I finally broke down and bought a pattern I'd been eyeing for about a year and a half for a very pretty dress that I was convinced would flatter my figure. There's not really much more to say about this dress, other than, "Voila!"
Oh, one more thing: instead of buying a hook and eye, I took the hook off of a bra and stitched a loop of thread for the eye.
Fabric <$2.00
Zipper ~$1.50
Pattern ~$3.00
Total: about $5.50
Also, I recently picked up a couple of yds from the Salvation Army (2/$1!) and am planning to use this pattern again. Also planning to use pieces of it for summer tops. This is one of, if not THE, best sewing deal on my own clothes that I've ever made!
Thursday, April 24, 2008
White Flowered Dress With Blue Ribbon


Pillowcases are only 25 cents at my local Salvation Army, providing the perfect practice fabric for my sewing projects. And it's usually no problem finding ones that are in good shape and with attractive (in any) patterns, so my daughter won't look like she's wearing bedclothes if it does end up wearable! This one is a perfect example.
The pillowcase I used is (was?) white with 2" watercolor-looking flowers that are either pastel blue, pink, or purple-ish with green leaves. I think it's just lovely. It's perfect for a not-too-girly dress, esp. with blue trim. Delicate without frills and puffs.
My mom gave me a pattern she bought in the '60s for a variety of baby outfits and accessories, and for this dress I used the basic front and back pieces for the pattern's dress. I could have put sleeves on it, but opted not to this time, as it was a dry run. I lined it with some white stretch cotton (like t-shirt material) so that you couldn't see thru it, and used light blue sating ribbon for the ties. I put in one tie at the neckline in the back, and then one long ribbon around the waist to tie in the back.
Things I would have done differently:
*Not used a stretchy material for the lining. I think it would have gone better if I had used another linen material instead of a stretch knit.
*Used a wider ribbon/material for the sash around the waist.
*Added another tie in the back for closing the dress, and put them between the dress fabric and the lining (I stitched them on after I put the dress together).
*Added another blue ribbon around the hem to tie it all together.
*Maybe not stitched the ribbon at the waist to the front of the dress. Maybe only stitched it at the sides as I had originally planned.
Materials Cost
Fabric <$.25
Ribbon $.25
___________
Total about $.50
Yay! Talk about saving money on clothes!!
Friday, April 4, 2008
Purple Sun Bonnet


The first sun bonnet I made was easy and fun. I had something else in mind for the overall look of a bonnet, and decided to make another. This is also a handkerchief-style bonnet with a drawstring in the back. The body of this bonnet is solid purple, and the visor is made of my favorite print (the tiny lavendar flowers with green leaves). It's lined with soft white stretch cotton. The visor can be worn unfolded or folded back around the face. On the back around the drawstring, I sewed on 5 little white flowers with beads in the middle.
This bonnet is too big for my daughter, tho, and would probably fit a 2 yr old, or a kid with a head circumference of about 20" +. I'm still learning, and I get a better idea of the right sizes as I go!
Fabric $.75
Ribbon $.35
Charm $.04
Flowers $.10
__________
Total $1.24
Gingham Sun Bonnet


Here in Iowa, it's getting too warm for the baby's winter hat but it's still too breezy for no hat at all. Also, she's outgrown her infant seat and no long has a canopy to keep the sun off of her while she's in her car seat. The obvious solution--a sun bonnet! Lightweight, with a sun shield, and almost as adorable as the baby!
Here's my first one. It's purple gingham, lined with soft white stretch cotton. The visor is wide white lace, the ties are purple ribbons, and it's complete with a white butterfly applique and a silver "Handmade with Love" charm.
Fabric < $.15
Ribbon < $.25
Lace $.47
Applique $.21
Charm $.04
__________
Total $1.12
(Materials only)
Thursday, April 3, 2008
Pillowcase Dresses
 I recently discovered this nifty little thing, and how easy it is to make! There are many different types, but I've started out with the simplest. It's a sack with armholes and a drawstring neckline, basically. I love it!
 On this particular one, I used my favorite print (tiny lavendar flowers with green leaves), purple ribbon, and white lace to trim this dress. It's a touch small--I think they're supposed to be really roomy, but I suppose you can make them fit however you'd like. I'm thinking maybe in the future of making a matching purse and booties.
This dress sold on eBay for $5.99. It's the first and only thing I've sold on eBay so far, and the first and only thing I've sold that I've sewn, so far. I'd really like to do more selling, so please contact me if you're interested. I love to sew and create custom pieces, and put much time and love into the details.
Fabric $.75
Ribbon $.68
Lace $1.00
___________
Total $2.43 (Materials only)
Subscribe to:
Comments (Atom)