I was putting together 2 tutorials, but neither worked out. Here's what that was all about:
I need a new cover for my calendar/checkbook bundle that I always have with me, but when I measured it all out I didn't leave enough room to slip the calendar into the sleeves! I think it'll fit a regular checkbook, but I haven't checked that out yet. Pretty disappointed about that.
 And the curtains... Gus has been up with the sun at 6 am and taking very short naps, so I planned to block out the light from his very bright bedroom. I wanted to make roman shades out of mini blinds (tutorial here), but when I looked for the blinds that I thought that I had for those windows, I couldn't find any. Not wanting to buy more stuff for these curtains (I mean, I've already invest $4 in a bed sheet!), I had another idea--to encase a cord on the back of the curtains so that I can pull them up and tie them off into relaxed style roman shades. That did not work. At all. So, the farthest I've gotten is draping them over the curtain rods. Just. Lovely.
 .....Not.
 I've also been working on a swimsuit for a friend (since last September! *cringe*) but it looks as tho it's going to be WAY too short-bodied. However, she's in Maryland so I'm just going to have to finish it and send it to her to see. Looks nice so far. But that won't do much good if it doesn't fit.
 And then there's the blue shirt. I'm making a top, and I'm not done yet, but it seems that every move I've made with this shirt has been a wrong one. I'd like to put ruffles and/or flowers on it, but I've screwed it up so badly so far that I've decided to take a small break from it before trying anything new. I don't think that poor neckline can take many more mistakes, and I don't know how it's not been fudged beyond repair yet. Discouraging.
 But there have been a few successes here and there. The black flower that I made for our lovely MOPS helper was such a hit that I made three to sell. This is a huge accomplishment for me, even tho they're simple little pieces, because it's been a LONG time since I've had the energy to make anything to sell. One is earmarked already, but the other two are up for grabs, as soon as I can manage to list them in my Etsy shop (or sooner, if you email me or leave a comment request!). But before I do that, I need to make sure I still actually HAVE a shop--it's been that long since I've tended it. :(
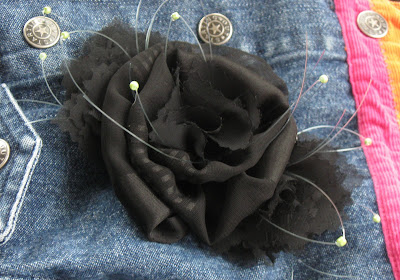
 Also, my kiddos found a large white fake flower in my crafting stuff and Little Miss requested that it be made into a hair flower. So, here's that... Pink button in the middle. She's worn it almost every day since I made it.
 And I'm done with the official mock-up of the pin piece to the wedding veil that I'm making. It'll all be white, and I'll use frey check on the chiffon parts to give it neater edges, and it'll be all-around neater all over, but this is basically it. I like it! But of course, any suggestions are more than welcome, as fabric flowers are not my forte.
And one more pin that I made a while ago, completely out of reclaimed materials (except the pin back). This one will go on Etsy, too.
 So, there you have it. What I've been up to for the last two weeks or so, outside of laundry, cooking, cleaning, and the rest of life. The weather's warmer here now so we're getting outside more, which just means it'll be harder for me to get crafty things done. But stick around. Hopefully I'll have some more energy to do more soon.
Have a wonderful Memorial Weekend!


 Fold it in half lengthwise, tuck in the short ends, and run a gathering stitch down the long raw edge.
 My machine gathered mine for me. Not sure what that was all about, as it was at its regular setting. If your machine doesn't do that, loosen your tension and lengthen your stitch as much as possible and pull your bobbin thread to gather it.

 For the whispies


 3. More glue.

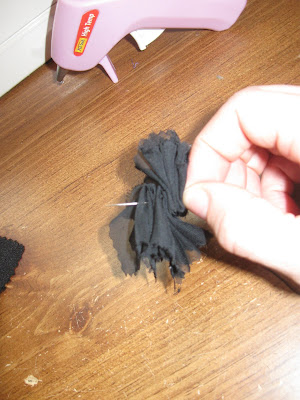
 Put a few squeezes of glue on the corner of your side flower. Lay 3 whispies across it, at the middle of the whispie.
  Lift up the side of your center flower and tuck your side flower, glued end first, under it. Put all the glue you need between the center flower and side flower to stick it well.
 Glue the side flower to the backing. Make sure it sticks well.