Thursday, November 10, 2011

It's the Most Wonderful Time of the Year

One year ago, I went through the most stressful time of my life. My husband's job was working him about 100 hrs/wk on night shift, I was 9 months pregnant, and the older two were 3 years old and 22 months old. Oliver was born on a Monday around lunch time, and my dear sister Brenda died early the next morning. I hosted Thanksgiving dinner two days later in a house much to small to fit everybody, and the day after that made a 4 hour round trip (more like 6 hr, said and done) with the two tiny kids and a very fussy 4 day old for the funeral. The next week, my husband started his new job 3 hrs away, only to come home on weekends. I parented 3 under 4 alone from December until March, when we finally joined him. Things got a lot better from there, due largely to the fact that dh is so much happier here, in a job and a location that he likes. Now, if only our house in Iowa would sell!

This is not the first holiday season that we will spend without Brenda, but it is the first time her name will not appear on my master list for gifts and cards. Likely due to the shock of the fresh event last year, I'm much sadder this time around. Brenda's childlike mind made for some lively discussions and happenings at meals and get-togethers. Now, there is no one to take your drinking glass to the sink to be washed before you're finished with it. No one to watch out the window, nails between teeth, worrying over who's late to the present-opening. No one will pull out his or her notebook and start their Christmas list for the next year just as soon as the last gift is opened. And for the life of me, I MUST find one of her hand-tracings with her ring sizes written on each finger!

Brenda, Easter 2009

There has been time to process some changes before the 2011 Christmas checklist was written up. Now more than ever, for some sad reason, I'm flooded with gift ideas for her. Here's one huge thing I learned from her passing: DON'T WAIT! If there's a small thing that you think would brighten someone's day, don't wait for a reason to execute it. If you feel like you should send a quick card for no reason to someone, do it! As often as it seems birthdays, anniversaries, and holidays come around, there's really no telling if they'll actually get here, is there? Nothing drives that home like an unexpected loss.

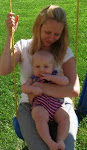
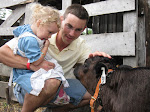
So this year, as Thanksgiving approaches and I am inundated with the seasonal tasks of menu planning, gift making and buying, and calendar keeping, my very honest thoughts on thankfulness are as follows: Take my money. Take all that is in my closet and hanging on my walls. Take our cars and our house (yes, PLEASE take our house!). Take our fancy dinner and the table we serve it on. Just let me enjoy my family--my loving husband, my precious children, my generous parents and in-laws, my siblings, my precocious nephews, and those friends who are close enough to count as family--for another year, and may I be so blessed to have even more.

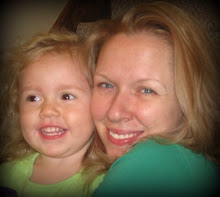
Happy Holidays, from my family to yours!

Thursday, August 4, 2011

It's Not "Free Time"...

...it's insomnia. That's how I'm able to get things done these days. At least, that's how I'm able to blog about it! So, here are some things I've been up to over the last week or two.

I kept a pair of worn-out pj shorts that I LOVED and turned them into a pattern piece. To do this, cut them in half at the seam that runs down the front and up the back (where the good Lord split ya!). Since shorts are symmetrical, you only need to double layer the fabric, right OR wrong sides facing, cut out two mirror-image pieces of the same pattern piece, stitch them up the middle (right sides facing), sew the inseams together, and install a waist band. If you use the fabric's selvage as the bottom of the legs, you don't even have to finish the edges! A great use for stray pillowcases or worn-out sheets with a few good areas left. I have 2 pair and plan for many more.

I am just plain tickled with how this top turned out! A while back, I made standard front and back pattern pieces based off a dress that fit well, so there's no guessing at the right size when it comes to making a new top. I just use the pieces and alter them as desired. This fabric isn't stretchy, so to accommodate my need for easy breast exposure (ahem, I breastfeed, please remember!), I made the front about 5 inches wider in the middle and ran elastic thru the neckline. And because I think raw bra straps are tacky, I gave it wide straps that taper at the ends. And a pretty blue ribbon to match the tiny floral print, so that I don't look quite so pregnant (I'm not, btw). I LOVE it!

I have trouble getting this pattern to fit right, but with enough altering, this dress finally did. And tiny sleeves, because arm fat needs a camouflage and I intend to wear this to church. Gifted fabric--free clothes! The undershirt underneath was $3 at Kohl's, but was also the pattern piece (by folding it in half) for the next two photos...

As per the aforementioned public nudity (I'm being facetious--I assure you, I'm quite discreet) I was in dire need of undershirts with stretchy necklines. So I worked up a couple. The lacey scribbles are deliberately shabby-chic, and mainly for sleeping.

I wear this one in public. The fabric is a little thicker than I'd like, but it's a good lumpy-belly-hider because it's not too tight.

I got an email from Etsy about herbs. The kind that are everywhere, so you don't realize what they are. I'm still looking for mugwort and a few other things, but I was very familiar with the first of the herbs they featured: plantain. Not the banana's cousin. I never even noticed it was anything other than grass because it's such a ubiquitous plant but there it was, everywhere I looked, when I looked for it! The short story: the juice in plantain is supposed to take the infection and pain out of bee stings, bug bites, cuts and scrapes. By now you're familiar with my feelings on free and natural stuff, so I've been cleaning out those little plastic shampoo bottles that jump into your luggage at hotels and making little bottles of plantain tincture. If it works, then I'll have nearly-free, natural "medicine" and facial astringent in a couple of weeks. If not, I'm out a few ounces of apple cider vinegar and I've de-cluttered a shelf in the bathroom closet. I think it will work, because when dh, f-i-l and I picked blackberries last weekend I got scratched up and stung, and it seemed to calm my irritated hands. But that could have been all in my head, so we'll see, when the tincture matures. You can follow one girl's adventures in plantain tincturing here. (Search "plantain". I couldn't get the direct hyperlink to work.) She's pretty enjoyable. I think you'll like her.

This last thing is just a plain good idea. Not mine, but good nonetheless! It's like a seat belt, for a regular chair. I saw this done on a blog that belongs to a mom who is by far smarter and more talented than I, and I wish wish wish I could reference it but I have no idea who/where she is. So, if anybody knows, please leave a comment below!

Because I couldn't find it, I had to come up with a design on my own. Little Miss happily modeled it for me here. It's like if you were to strap a diaper to a chair, and strap the kid in the diaper. It rolls up neatly and can be tied with the straps. I was going to put some sort of pocket on it to fold it into, but really, who has the time??

Back view. I used D rings to secure it. (Don't buy those new--harvest them off of 25 cents thrift store belts!)

For the front strap, which goes around the child and the chair, I used an O ring and a plastic clip that, I think, came off of a pair of snow pants. I would have used those plastic clips that are on stroller straps, but I didn't have any on hand.

Here's my sketch, if that helps any.

And here's one of the three most important things I've been working on. See those 4 teeth?!?! They're SHARP! And I don't recall the other two biting quite so hard...

And now I'm off to potty train my two year old. I'm ready for only one kid to be able to cover me in poop. Wish me luck!

Saturday, June 11, 2011

Tutorial: One Double (Full) Fitted Bed Sheet to Two Toddler Fitted Sheets

When we moved, Grandma J gave us two toddler beds and the double bed that Little Miss used to sleep in became the bed in the guest room once again. We found ourselves in need of more crib-sized fitted sheets, and with a surplus of girly double sheets. In case you were wondering, as you can see in the pictures below, a double sheet is almost exactly the size of two toddler bed sheets. So, naturally, Mommy got an idea.

See how, when folded in half, a double sheet hangs off a crib mattress? This is a perfect size, when the corners are fitted, for a crib mattress sheet.

Also, notice the toddler in the picture. It is important to note the virtual impossibility of snapping a photo of a mattress on the floor in the presence of a toddler without said child bouncing on the bed.

Another view, another child.
Okay, here we go...

1. Fold your sheet in half. Cut along the fold line.

2. Finish the edge. Doesn't matter how. Serging it is fastest. I did that on one of the "new" sheets for sake of time and ease. On the other (in the pic), I folded the edge under and sewed a straight stitch to match the finished edge that was already on the sheet.

3. Looking at the corner of the sheet, you can easily see with a striped pattern that they meet at a 90 degree angle. This means that you can simply cut out a square and join the sides to make a new corner. This can be done by folding in one corner to make a triangle and cutting along the edges.

To find the size of the square I needed, I needed to know the length and location of the side of the corner that was already in the sheet. This was easy to find because of the stripes. I measured the seam of the existing corner to find the length, and followed the stripe across the sheet to find where the edge of my square needed to be placed on the long side of the sheet.

4. Place pins to mark where your edge should be. Fold in the corner to make a triangle, and pin in place to avoid fabric shifting as you cut. Cut two sides, using your triangle as a guide.

5. For the other corner, you can repeat step 4 or use the square that you just cut out as a guide. Just lay down the square that you just cut out, and cut around it.

6. Match your new raw edges, right sides of the sheet fabric facing.

another pic of the edges matched up

7. Sew the raw edges together. Finish edge (zig-zag, serge, or fold over and hem).

8. To figure out how much elastic you need to fit your corner, simply measure the elasticized length of the sheet. Do NOT stretch it out for this part. (There are no red squiggly underlines showing up, so I'm assuming that "elasticized" is, indeed, a real word.)

Obtain 2 lengths of elastic for this.
Because I used re-purposed elastic--and, come to think of it, a gifted sheet--this was a completely free project for me!

9. Find the middle of the elastic.

Mark it and match it up with the corner seam on the sheet.

10. Holding onto the middle of the elastic (which is pinned to the sheet), pull the first half of your elastic as tight as it will go and find the point of the fabric it reaches to. Start sewing it from there. I think I used a multiple zig-zag stitch, set on the longest length and widest width. When you get to the middle of your elastic, take your pin out and keep sewing, pulling your elastic as tight as it'll stretch.

11. And... you're done! If you're lucky your toddlers will be over the moon at the awesome sheets that Mommy just made. If you're really lucky, they'll give you a real boost by running to Daddy to gush about what a great job Mommy just did.
This day, I was lucky. :)

Tuesday, May 31, 2011

Quick Note

I am working on a post that will act as a two-month update of what I've been up to. Unfortunately, it's taking about 2 months to complete, but I'm trying to get it done! I just needed to drop in for a quick holler about a blog that I just found and WISH I'd found months ago.

http://diymaternity.com/

It's awesome! I love it! If you're at all into DIY clothing and you're in the motherly way, or you know somebody who is, check it out! I found it while searching for nursing top ideas, and it's good for that, too. Love it!

Wednesday, May 25, 2011

Finally Settled

We've been in our new house for almost four months now! (Sad that when I started this post, it said "two months"--that's how long it takes me to get things done around here!!) As per usual, I can't believe that time has flown by as quickly as it always does, and there's also the usual guilt about not posting in, like, forever. (I think 4 months qualifies as "forever" in the blogosphere.)
I have been thinking that I haven't done a lot that's blog-worthy, and then I realized that, with as much time as I've found for sewing, there's got to be something I can chat about for a minute. So, here goes! A little bit of everything--mostly money-saving projects and ways to simplify.
(Are we noticing a pattern here?)

Hmmm, let's go back. Way back to the beginning of April. Prom season. Our church in Iowa did a dress drive, as the area is economically depressed and there was quite a call for formal wear without the cha-ching. I agreed to help, and ended up remaking a David's Bridal bridesmaid's dress for a girl with a more edgy style.
before

I shortened it, added a gunmetal gray taffeta pleated ruffle along the scalloped edge that ran from the waist to the floor and to the top edge of the dress (I took the straps off to make it strapless), and turned the top 8 inches or so into a corset-style lace-up back (it was a hidden zipper that wouldn't quite close). I think we were all pretty happy with how it turned out.

after-front


after--back, everybody's favorite part!

Just another reason our old church--First Cristian Church (Disciples of Christ) in Keokuk, Iowa, was the most fantastic place I could imagine to bring up a family and get involved in the community. How we miss it!

Hmm, what else have we been up to?... There was a good idea from Tight Bod With a Pod that has proven quick and fun that I thought I'd share. We call it French Waffles.French toast on the waffle iron...

One happy French-Waffle-eatin' boy!

All you do is whip up french toast ingredients and soak the bread, but instead of frying it in a pan, you just lay it on the waffle iron. It's simple, easy, and if you're making waffles anyway, it's one less pan to wash. And I'm all about less dishes. :)

I'm also all about quality. So often quality comes at a reduced price when you're making your own stuff. Vanilla extract may or may not be one of those things, but it's certainly not as expensive as you'd think. We LOVE using our own vanilla extract! And if you've ever thought about trying your hand at it--or just eliminating the gazillion tiny plastic bottles and questionable origins and ingredients of store-bought vanilla--go for it! It's as easy as chopping up a vanilla bean, putting it in a glass jar with some cheap vodka (or bourbon, or whatever strong alcohol you find on sale), keeping it in a dark place for a couple of months, and shaking it every day or so.

Okay, so that sounds like a lot when I have to type it all out, but all you do is save the glass bottle from your last Snapple purchase, visit www.spidercamp.etsy.com
for some very reasonably priced beans (hurry--I think she's almost done de-stashing!), adding 1 cup of alcohol for every three beans, and setting it in the cabinet in front of your coffee or cereal or whatever you get into every day so that you see it and remember to give it a quick shake. Try it. You won't be disappointed. And if you don't use much vanilla extract, then hey! Vanilla vodka! I'm on board with that. Anyway, read more here.

Here's a re-purposing project I recently tackled. I could see this skirt in my head, based off of a bunch of lace scraps and some old fabric of a beautiful ecru color all given to me by a good friend at our old church, and I was absolutely tickled with it when it came together. Little Miss wanted one when she saw mine, so I made her one to match. I do not usually approve of Mommy-and-Me outfits, but I'm not dressing like a toddler and she's not dressing like an adult, so I was okay with this. They're beautiful, unique--I just LOVE how they turned out! And they were completely free to make. Think of all the possibilities! Take a tube of fabric that is bigger than your hips, your ribbon or trim scraps, elastic or a drawstring for the waist, and get to stitching! If anybody tries this, I would LOVE LOVE LOVE to see your results!

We are making a conscious effort to follow an even tighter budget. I thought I knew what we were spending. I thought. Then I re-thought. And I got even more creative! Here are a couple of ways I've spent less and avoided extra trips to the store (a very valuable thing, now that we live 20 minutes, and not 5 from it.)

Homemade syrup! This is a FANTASTIC idea, especially if you have your own berries to pick. We use it on waffles, pancakes, smoothies, to flavor our homemade yogurt... infinite topping possibilities. I use this recipe as a guideline and use whatever pureed fruit we've got. Dear Husband is a big fan of raspberries, and I'm a big fan of Dear Husband, so we usually have homemade raspberry syrup in the fridge. Y.U.M.

I very seldom buy candy, and we don't feed a lot of it to our kids, so when DH went to a wedding and brought home a few favor bags of kisses, I saved them from a long, cold imprisonment in the freezer by making kiss cookies. Okay, so I know this qualifies as "feeding my kids a lot of candy" that day because they were gone immediately, but WOW they were good! I used this recipe as a guideline, but did a mix of equal parts of brown, white, and confectioners sugar. It's a mainstay in the recipe folder now. You know when DH is grumpy because he didn't get enough before they were gone, it's got to be good!

Brace yourself: this is a little personal! Since I cloth diaper, I'm not afraid of kid pee. I mean, come on. Just deal with it. Spring water, right?? lol If you saw Little Miss taking "enough" tp after a tinkle, you'd think she was headed to the resident neighborhood crotchety old man's house on Halloween. So I took a receiving blanket (one that was hers, so it was pretty and girly instead of the sea of blue we've been swimming in for the last 2 years) cut it into squares, serged the edges, and now we have reusable wipes! We also have greatly reduced paper goods bill and paper waste, and she gets dryer without any lint. They go straight into the diaper pail which sits in the bathroom, and everybody's happy! Mom, most of all.

We also found ourselves in need of kitchen cloths. Being in a rental (not to mention, a rental that is painted in a completely different color temperature than any room in my old house, so we have no matching decor!), decorating and coordinating is VERY slow going and tedious and... well, interior decorating just isn't my thing. And I'm NOT going to spend $$ on something like dishtowels, which SHOULD match something else--anything else--in the kitchen, which doesn't have a color scheme or theme, and will get stained up and overused and abused and heavily laundered. Not when I have a length of crazy-printed retro terrycloth, also gifted by a friend in Iowa, that was too unique to throw/give away but (previously) too ugly to do anything with. It's the right color temperature for the walls, so now it's my new set of dishtowels and kitchen cloths! You just can't go wrong with a serger, I'm tellin' ya!

In need of a small storage space for a few kid distractions in the upstairs living room, I whipped up this cheery little fabric bin out of an old table cloth that someone gave me. The insides are those plastic grid sheets that you get at craft stores that you can do yarn hooking with (no idea how to explain that further--I don't indulge in that activity). It's pretty flimsy, but when we retire it upstairs, it'll be good for trim scraps in the craft room. I think it took less than an hour to make. I used this tutorial as a guide, which I found on www.oneprettything.com.

A few other things I've been working on (and not likely to be done with any time soon!):

Baby Oliver is almost 8 months old! He is fantastically happy, and LOVES LOVES LOVES his brother and sister! They love him, too, which provides for some pretty cute kid interactions around here. And some scary ones, too, as hugs can be very tight and not-so-well placed. But all in love.

Why does it seem like during summer time, when there are the most daylight hours, you have the least time for anything?? Since we live in the country and no neighbors have a view of our back yard, my kids have been bathing on the deck! Just another clever way to multi-task! We fill up the baby pool with bubble bath, they play and get clean at the same time, and when it's time to come in we pour a bucket of water over them and voila! Bath time AND play time are done! Now, don't ask me how many time I have to throw all the bath toys and floaties back up over the railing from the yard, but it's totally worth it. And my aim is getting much better. :)


And here's what DH has been up to. This was taken a few weeks ago. My loving baby-daddy has been harvesting zucchini, summer squash, cucumbers, and a pepper here and there, for a week or two now. And the tomatoes are coming in. Bring on the pasta sauce! Food budgeting just got a lot easier!

This is where I'd like to remind you of the best zucchini bread recipe I've ever encountered. And some tried and true "improvements": reduce the sugar to one cup, replace at least half the oil with applesauce, replace 1 cup of the flour with whole wheat flour (or more than 1 c if you're using white whole wheat). And adding in some nutmeg makes it a little more Christmas-y, which I love, but DH prefers it less spiced.

The homemade things I checked off my to-do list yesterday could make another 4 month long blog post... mayo, jam, breads, cookies, pillowcases... but I won't put you through that. Not when I'm so dangerously close to finishing this book!

Monday, March 21, 2011

I'm Busy, Busy, Dreadfully Busy!!...

Veggie Tale fans might recognize that song...
Anyway, we're entering a terribly busy week, one I've been dreading for quite a while... WE'RE MOVING!! So long, Keokuk, Iowa, and hello, Hallsville, Missouri! Well, the countryside between Hallsville and Columbia. We're getting the best of both worlds, I think--small community where everyone knows everyone, and good shopping just a few minutes in the other direction. When we were in Columbia last, I was sitting at a stoplight and found myself staring at a purely magical sight--a big, brand new ALDI!! And the size of their new Hy-Vee is almost shameful, so the grocery shopping part is all taken care of. Yay! And, of course, a real shopping mall, complete with a Target. Every girl's dream, when you consider what a nightmare it is to live more than an hour away from one.

Here we go, getting ready to leave our little Iowan oasis behind for good--or at least for mostly good, until we sell it. Anybody looking for a nice little mid-western stronghold, btw? :)

Brenda and August, somewhere around mid 2009

In other thoughts, today would have been my late sister's 41st birthday. It's tough to think about how much she loved her birthday, and to think about how I should have always done more for it. I'm learning a huge lesson in not waiting for a special occasion to send gifts, and not holding out when I do. She, as is the case with most people we love and take for granted, deserved more every time.

There is a fantastic site that I've recently found, and I feel I must share it. www.MamAmorDolls.com offers the most gorgeous handmade fabric dolls I've ever seen, and--are you ready for this??--they hold, give birth to, and breastfeed the baby dolls!!

I cannot afford one, by any means, and my crafty side wouldn't let me buy one anyway, so what do I do? Naturally, I do searching for instructions and patterns for making my own. I thought I was a progressive thinker, but I just can't bring myself to explain to my 3 y/o exactly where babies come from--I mean, I'll at least wait until she asks!--so mine is sans vagina.

And because she's a dry run, she's also without nipples and baby for the moment. But I did try making one, and they're much harder than you'd think! But Little Miss adores Mamadoll, and she's easy to sew clothing for, so we'll keep her around until I get better at it. I'm sure there will be pictures at some point, but she hasn't gotten up yet. I know, I know, it's 11 am! But with no baby, she gets to sleep in. (Remember those days??) Also, no way am I putting a picture of Mamadoll next to these works of art. No. Way.

If I could take an interesting picture of cleaning and purging, I might. But nobody cares about that stuff. And now I'm off to do more of it.