I cannot think of how to start this post. The past week brought much happiness and much grief.
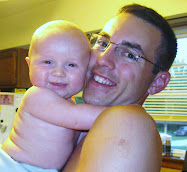
First, the baby! My 8 lb 5 oz, 19.5" long son was born at 11:39 am after a mere half hour of hard labor. I was induced at 7 am, had my water broken at 10:30, and there he was, just over an hour later! This was by far the shortest, easiest labor and delivery I've had, with the best results in regards to my body.
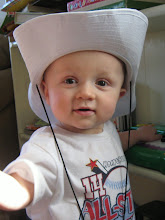
Here he is:
Oliver Daniel Jamison Schanzmeyer!
Oliver Daniel Jamison Schanzmeyer!
 I truly believe that the ease of this birth had everything to do with the short chapter I managed to eek out of a Hypnobirthing book about relaxing through breathing so that you can let your body do what it's supposed to, rather than fighting against it. I didn't have much time to practice this time around, but for our next birth, I definitely plan to read the whole book and practice the techniques ahead of time. Perhaps that last half hour will go smoother!
The birth of a child can easily be called the happiest moment of one's life. My happy moment was followed less than 24 hours later by one of the saddest; my sister Brenda, at 40 years old, passed away unexpectedly. She was disabled and had been having medical issues that were never able to be resolved before she withered away. She died with a bad kidney function and high blood pressure after a period of intense weight loss.
 The circumstances surrounding her death have left me with profound grief. It's such a confusing time, something to awful riding hot on the heels of one of the happiest events of my life. I'm trying to focus on the positive: I didn't have to labor and deliver a baby after she passed, for example. As hard as this is, I think that would have been near impossible.
And then, two days later, the Thanksgiving holiday brought a load of family to our little home, another happy day tinged with sadness due to Brenda's absence. Her favorite thing in the world was socializing, spending time with her family, playing with her niece and nephews. I missed her buzzing about, clearing the table too early, telling stories about her dog chasing skunks and licking her face. Who would have thought those things did, indeed, need to happen to make it feel like nothing was missing?
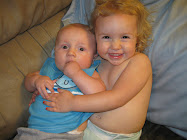
Now that we're back home (services were Friday, and we packed up our toddlers and newborn and made a seemingly LONG day trip out of it) I'm hoping to get to rest up and sort through everything. Here's another picture of our favorite part of the circle of life: the beginning.

Now that we're back home (services were Friday, and we packed up our toddlers and newborn and made a seemingly LONG day trip out of it) I'm hoping to get to rest up and sort through everything. Here's another picture of our favorite part of the circle of life: the beginning.