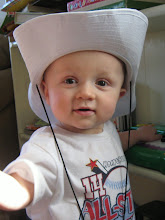
Wednesday, September 29, 2010

Etsy Shop Update: Great Guy Gifts!

As promised, here is the other latest stack of ready-to-list handmade wares to emerge from my work room over the last couple of quiet weeks: Mini Rice Pack Sets!

These are fantastic for anybody, but these prints are particularly suited for the guys on your gifts lists. At the moment I have these 4 ready to ship:

They're pretty quick to sew up in almost any color or print--just ask!

Tuesday, September 28, 2010

Etsy Shop Update: It's Getting Colder!

In preparation for the even colder weather just around the corner, I've been working on a few fabulous hat/scarf/arm warmer sets made from thrifted sweaters. And I couldn't be happier with the results! First, I found a green and a red sweater. Then I got my scissors and matching thread. And then... out popped these beauties!

A little more about them: The scarves are "infinity scarves". That means that, instead of being one long line, they're circles! They are very cute draped around your neck once like a cowl, or wrapped twice. As for the arm warmers, I'm calling them "fingerless gloves" in my shop listings. They're cut out of the sleeve of the sweater, and they've got a slot for the thumb. They're the most adorable thing I've seen in a long time!


I'm really hating that I don't have models, with the sad excuse of an exception of my own arm. I don't feel like these pics do the warmer sets justice. They just look so great ON!

And now, the romantic twist to my shop update:
This is a gorgeous accessory made with double-sided satin ribbon and acrylic beads. Simple and elegant, PERFECT for holiday outfits or just dressing up jeans and a cardi. The ties are very long, so it can be worn at any length from choker to mid-chest. I have a few of these that I wear constantly, and I'm finally getting around to taking the 1000 suggestions of, "You should sell those!" lol

So, there you have it for today. Stay tuned for a simple yet extremely practical (those 2 things usually go hand-in-hand, do they not??) guy gift! Coming soon... as soon as I can upload it. :)

Saturday, September 25, 2010

How to be the Dread Pirate Roberts on a Shoestring Budget: Part I

You may remember the (in my humble opinion!) fantastic costumes Hubby and I donned for our friend's costume party a few weeks ago. (If not, go here.) Since Halloween's fast approaching, I'm going to go over the Dread Pirate Roberts costume and give some insight into just how cheap and easy it was to create. I think you'll be surprised!

The elements of this costume are:
1. Skull cap/head cover
2. Eye mask
3. Shirt and sash
4. Pants/leggings
5. Boots (spats/shoes combo)
6. Gloves
7. Sword

To begin with, some overall things to remember: *All of these elements must be black, and not all blacks are equal. If you've got something old and faded, it might be very obvious next to something new and dark. Pay attn to that, if details are important. *Nick was mistaken once or twice for Zorro, which made me realize that this costume can easily be converted to a Zorro costume, or any masked crusader or pirate you care to match colors or details to!

1. Skull Cap
The skull cap was simply a rectangular piece of stretchy black material. Nothing more. Because it was a kind of jersey, I didn't even finish the edges (jersey doesn't fray). A bandanna would work if you've got a black one around. A good condition t-shirt would be perfect, which you can usually find barely or gently used ones at thrift stores, or discount stores usually have them for cheap.

2. Eye mask
This is one long, thin rectangle with holes cut out for the eyes and a triangle cut out for the nose. Make sure you have enough left over to tie it behind the head. You'll only know where the eye holes and nose triangle should go by tying it on and marking the location of your pirate's eyes. Note: When I say "triangle", I don't mean you should end up with a triangle-shaped hole to stick your nose through. It'll be more like a pointy recession in the edge of the rectangle that goes across the nose, in order to prevent the material from riding up on the nose. Play around with it. You'll figure it out. :)
Perhaps the best thing for your skull cap/eye mask combo would be to find a dark black t shirt and use it for both these pieces. While they're two different pieces, the material should be an exact match in order to avoid a contrast. Your pirate will probably want to take off the eye mask at some point during the evening.

Oh, I almost forgot! DON'T forget the mustache!!!
Nick grew his out for a week or so. It was charming. :)

3. Shirt
This was the most difficult part of the costume. The only reason I was able to make it without buying a pattern is because I have a knack for free-handing. However, even if that's not a skill you have, you should still give some thought to creating it yourself. There are patterns available for this type of shirt, or you can use a shirt that fits your pirate already and go from there. Because it was a little more complicated than cutting and pasting, I'm going to save this part for another tutorial.
If you don't want to try your hand at sewing a pirate shirt, see if you can find a long-sleeved shirt with generous sleeves at a thrift store. You can dye it as needed. Don't rule out the ladies' dept--that's where you're most apt to find this style of shirt. And don't let ruffles on the neck scare you off. You can either leave them (that's an excellent pirate shirt detail in many cases, tho not Pirate Roberts') or just cut them off and replace them with grommets or button holes and add a black draw string. Anyway, more on the shirt later.
The shirt should be a little long, and a sash tied low around the waist or around the hips serves as a sort of belt for the shirt as well as a place to stash the sword. I used the same jersey material as the skull cap and eye mask. It was just a long rectangle.

4. For the pants, I found a pair of leggings on clearance at WalMart for $3. It was just that easy.

5. The boots presented a small challenge, but only for a second. I have no idea where I saw it, but it occurred to me that Nick had black shoes and all we really needed was the tall part of the boot. So I got a pair of black slacks from the Salvation Army, cut the legs off at the thigh, turned them down to resemble tall, slouchy boots, and spray painted them. I'd recommend stitching the top in place (depending on your fabric, you may need to finish the hem to keep it from fraying), and you'll probably have to pin them to the pants to keep them up. I spray painted them because I wanted to give them a rough, stiff, leathery look, and because the inside of the pants didn't exactly match the outside in fabric grain and shade. This step is entirely optional. If you're happy with how your spats look, don't bother painting them.
Wear them over black shoes. As long as they're all black, any shoe should probably work--especially if you're able to cover part of the shoe with the spat (get a slightly flared or boot-cut pant). Nick wore leather shoes.

6. I completely forgot to get gloves for Nick's outfit! Any black leather gloves should do. Roberts' flare out around his wrist and are just a little long. Or, NO gloves will do just fine, too, as it was much later that I realized we'd forgotten them! Clearly not a making-or-breaking part of the costume. :D
7. The final element to this costume is the sword. This and the shirt were the only real challenging parts of this costume. I went to WM and looked for toy swords. Bright orange Nerf wasn't going to "cut it", so to speak. :) So I made one out of dowel rods that I spray painted silver and picture hanging wire. I used an entire dowel rod for the shaft of the sword, and a 7" scrap for the handle. I used hot glue, but it didn't do much for reinforcement. If you think you have glue that would add to the stability, go for it. :) For the handle, I made a cross shape at one end with the scrap and wrapped some of the picture handing wire (any thin silver wire should work) around the two pieces to hold everything in place. Then, by overlapping lengths of wire and lots of wrapping and twisting, I made a sort of decorative handle out of the wire. I don't know that I could describe exactly what I did to make it, but anything you can figure out will work perfectly. You could also use wired ribbon, I think, or wrap some wire with silver ribbon.

And there you have it! Well, minus the shirt tut, which is in the works. Have fun, and I would LOVE LOVE LOVE to see any pictures of costumes you come up with!

Monday, September 20, 2010

Etsy Shop Update: Beaded Flower Pin, Cup Cozy, and & T Shirt Bags

I'd like to take this opportunity to introduce you to an Etsy team that I'm on. It's the Fashion Remix team, and they have a shop exclusively for items made mostly or entirely of reclaimed materials. I have a couple of things in there--these awesome t-shirt bags perfect for grocery shopping or trick-or-treating, and this great felted wool cup cozy that I hand-beaded and embellished. I encourage you to check out their listings, as well as the individual artisans who make up this talented team of sellers.

One reason I joined this team is because I'm devoting more time and energy to doing my Etsy shop "right"--making a cohesive, focused product line, taking uniform pictures, etc. Basically, making a store people want to shop at! And sometimes that means I make something that doesn't fit in with my primary product line. I feel that the Fashion Remix shop is a good way for me to keep making these other things that I enjoy and that I think my customers will love, without having a hodge-podge store front. So, shop there! It's great stuff!
That said, my product line in www.MRSdesigns.etsy.com continues to develop in a good direction, and this week's addition is this very pretty beaded flower pin.

As I love to do so often, I made this piece out of reclaimed materials--a polyester scarf--and hand-beaded it to add a little pizazz. It's big and beautiful, and will turn an ordinary outfit into a stylish autumn ensemble in no time! And at $12, it's an absolute steal.

Shop eco-friendly this week and support some great artists in their crafty endeavor to make the world a cleaner, more stylish place!

Happy shopping!

Sunday, September 12, 2010

Etsy Shop Update: Beaded Ivory Satin Brooch

This one really came out of nowhere! It's almost like it developed entirely in my subconscious and my hands just sort of worked it out on their own while I watched SNL. :D I'm very happy with it--so happy, in fact, that I finished it up and put it in my shop this morning!

Constructed of ivory/antique white satin over 2 layers of stabilizer, with 2 brooch pins on the back to keep it in place. Measures 3" by 3". See more here!

Friday, September 10, 2010

Etsy Shop Update: Three Brown Charlies

What a week! What can I say?... I'm tired! We kicked off the week by sending company home from last weekend, I got to see what it was like to transport 4 under 5 to church and back on Wednesday (went quite well!), Gus had surgery on Thursday (also went quite well!), my mom stayed with us overnight to help with Little Miss, and I got almost everything on my to-do list DONE!! Which included constructing and listing three Charlie bag sets--that is, a tote, a pouch, AND a wallet--much like the one I made for myself, in my Etsy shop.


AND! To make matters even more impressive, that included an extra Charlie (another one made with the brown with blue circles) because the first one sold before I even had it finished! And I'm just going to go ahead and say this, because it amazes me and I'm very proud of it: the new owner of that Charlie bag bought it because she wasn't happy with her new Thirty-One bag. Imagine, someone buying something I made to replace a Thirty-One bag! I've never owned anything from that brand, but I have been super impressed by their catalog, so I'm taking this as a huge compliment! :D

To see more pictures, or to own one of these lovely ladies, head on over to my shop! Thanks so much for reading, and Happy Shopping!