Monday, February 22, 2010

Hair Bows for Little Miss

Before I took a hiatus from my sewing room (I haven't seen it in DAYS!), I made these. Actually, I made these on the couch in the living room, so I guess it was after my sewing room hiatus and just before my crafting hiatus.
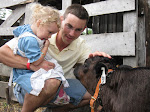
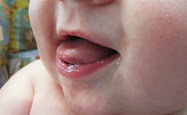
Nick went to his hometown last weekend to make panhas with his aunts, uncles, and cousins. We stayed home because we're on germ patrol (Gus is having hypospadias repair surgery this week and must be perfectly healthy). I took the opportunity to do a little home remodeling, while my well-intending poo-poo'er was away, and ripped out the cabinets in the kitchen that have so irritated me since we moved in. Next up: building whatever storage unit for the other side of the kitchen, and a table and bench set to eat on. I have a feeling that this is going to be done as a distraction from the gruelling hours of coddling our recovering son that I'm anticipating. Pictures later, I promise.

Friday, February 19, 2010

More Than a Shoe Box...

...It's the first step in realizing a dream! Okay, it's not like I went to the Olympics, but anybody who's ever found themselves repeatedly thinking about how they REALLY want to do something, only to hear over and over how they can't do it for some reason, knows exactly how satisfying it is to take that first step and see some results. It's like a door, which has always been bolted shut and boarded up, has just flown open in front of you and suddenly there's nothing keeping you from all the goodness on the other side.
Sort of a lot to say about a shoe shelf, I know, but that's what's really going on for me, by building this. It's not a big, wonderful project, but I wanted to start really small, in order to get comfortable with the tools. (hehehe: I said that to Nick and he said, very nervously, "what... tools...?") And I have Ana at http://www.knockoffwood.blogspot.com/ to thank for the final push that sent me into the hardware aisle. I have been talking myself into woodworking for a long time, but seeing her stuff (I mentioned it here) was exactly the motivation I needed to just go for it. Thanks, Ana!

I put this together in two naptimes, roughly.
It started out as a closet door. This was VERY big and VERY heavy.

The only things I paid for were the screws (18 screws at 11 cents each) and the can of spray paint that I decided to use at the last minute (somewhere around $4). TOTAL COST: About $6.50 Would have been about $2 had I used some of the random half-cans of paint that we have around the basement and in the closets. I'll probably do that next time.
OH HECK YES, there will be a "next time"!!

Because Sometimes It Doesn't Work Out

Here's to mistakes!
*insert glass clinks and "Cheers" here*
I had two t-shirts that I bought for $5 each at JC Penny's a year or two ago, and altho they were my size, my style, and colors I like, I almost never wore them. Well, obviously I wore the purple one enough to get a bleach spot on the collar, but otherwise they were in perfect, barely-worn condition. I decided to get a little bit of toddler-dress practice in and try doing a shrink-down. This post is for all of the people who ever had the idea that I don't end up with nothing but a pile of scrap fabric sometimes. There probably aren't any people who think that, but let's make sure it stays that way. :D Even tho Little Miss loves this dress, I have still dubbed it a disaster. But it was worth the practice! And the liberated hanger in my closet.

Monday, February 15, 2010

Carebear Pillow Decon/Recon

I've mentioned before that my friend Alma's daughter outgrowing her Carebear decor has taken most of the work and expense out of decorating my toddler's room. However, years of love have taken their toll on a couple of items. A recent bequeathment from Kristen was a small pillow, which had clearly been well-loved. I'm sure you know the type. The back probably used to be white. The front was still in perfect shape, tho, so I salvaged it and went spelunking into my sewing room and found a bold retro flower print that compliments the Carebear color. We were bombarded with baby blankets when Little Miss was born and still find ourselves with an abundance of those, such as this pretty pink fleece one with embroidered flowers. So I got out my pinking shears, and here's what I did with it all:


Total Cost: Free!
Thank you, Alma and Kristen!

Cheers!

Some days warrant a tall glass of wine at the end of them. Currently, the only wine in the house is some failed home brew that leaves me with a belly ache. Clearly, if you back up just a bit down the blog, you can see that we do have..... Vodka! I raided the fridge and found lemon juice, lime juice, 7-Up, some cherries--but I have no real idea how to mix a drink, other than the small handful of drinks that my sister offers at her bar. So I went looking for the allrecipes.com equivalent for alcohol, and BAM! Found it.
If you have any interest in drink mixing--whether you're looking for a good punch recipe or you find yourself with vodka when you usually have wine--go there! My relaxing evening included a Vicious Kiss. Lime juice, cherry juice, vodka... pretty good! Thanks, DrinkNation!!
Except, this really made me wish we'd gotten more expensive vodka. ;)

Saturday, February 13, 2010

Vanilla Skyy

After reading about how ridiculously easy it is to make your own vanilla extract, I couldn't resist. After doing a tiny bit of Googling, I ordered 4 Bourbon-Madagascar vanilla beans from spidercamp on Etsy. Very good price ($1.05/bean, after taxes and shipping), nice looking beans, VERY fragrant!
I have decided that I really, really like vanilla beans just for the fact that they're vanilla beans. And okay, so our vodka wasn't "Skyy", but just try to come up with a more clever title for this post!
Vodka + vanilla beans + 8 weeks of shaking & storing in a dark place =
I NEVER run out of really yummy vanilla!!!
All you bakers will understand how exciting and important this is, I think.
I read that any cheap vodka will work, so that's what we got. The most common ratio I remember from the sites I visited was one cup of alcohol to 3 beans. I had 4 beans, so I used 1 1/3 c.
Ugh, that looks REALLY gross!! lol
We have a few Gold Peak Tea bottles (which I highly recommend, if you must spend money on iced tea) and the bottles are wonderful to reuse for all sorts of things because of their lovely neck and tight-fitting caps. And because they're clear glass.
We decided to make it a couples affair, so Nick helped slice the beans, scrape out the pulp, stick it all in the bottle with the vodka, shake it all up, and put it away. So, we shall see, in about 2 months, how wonderful our vanilla is!

Excellent Dairy-free Cinnamon Rolls!!

My husband did something really, really awful to me this morning. He made a pan of cinnamon roles from scratch that smelled like heaven and looked like a Swedish vacation. I can only assume that they tasted like a day at the beach, but I couldn't have any because he used BUTTER!! And milk and yogurt... ugh.
But his foray into sweet, sticky baking produced one desired side effect: I had forgotten that there was a dairy-free cinnamon roll recipe that I had been meaning to try. This morning's kitchen aromas were just the motivation I needed to find that recipe and get to it! Of course, I couldn't find the exact recipe I thought I'd saved, but it wasn't too hard to find another one. However, it didn't take long to notice that the wet:dry ingredient ratios were off, the oven temp was missing, etc, etc. So here's what I did, based off of the incomplete and incorrect recipe that I found (from where I couldn't even tell you it came):

3 c all-purpose flour
1 pkg quick-rise yeast
1/4 to 1/2 t salt
2 1/2 T sugar 1 c rice milk or water (or milk, if you're luckier than I)
1/4 c oil (I used canola)
2 T butter substitute (I'm not sure if oil would work here or not)
4-6 T sugar
1-1/2 t cinnamon
1 or 2 cups of thin powdered sugar drizzle

1. In a large bowl, combine 2 c flour, undissolved yeast, sugar, and salt. Add the milk (warmed to 120-130F) and oil. Mix with a spoon until combined.
2. Add the remaining 1 c flour and stir well. Add more flour if necessary (probably will be). Dough will be sticky, but you should be able to pick it up out of the bowl without it falling out of your hands and making a huge mess. Knead 6-8 minutes. Divide in half and let rest for 10 minutes.
3. Roll each ball of dough out on a floured surface into a rectangle until it's around 1/2 inch thick. It will measure around 8 or 10 inches by 14 or 16 inches. Go thicker or thinner if you want. That's a personal preference.
4. Combine 4-6 T sugar and cinnamon. On each rectangle, spread about a tablespoon of butter substitute. Sprinkle half the sugar/cinnamon mixture on each rectangle. Roll them up, starting at either end, depending on how thick/how many rolls you want.
5. Slice the logs into rolls. I went about 1 1/2 to 2 inches thick. Arrange them in a lightly greased pan. I used a glass pie plate, and it was the perfect size for the whole batch. Bake at 375F for 18-22 minutes.
6. Cover them with thin powdered sugar icing. This is just powdered sugar and vanilla thinned out with milk [substitute] to the desired consistency. If you can manage, let them cool for a few minutes. If not, dig in.
If you have any additions, corrections, comments, suggestions, or stories of your own cinnamon rolls, let's talk! This was the first time I've ever made these, and they were GREAT! I actually ate almost half the plate in their first hour out of the oven. I'm ashamed to say that three were gone when I pulled them out a little early and they were still partly raw. I just couldn't stop! SO GOOD!

My Subconscious Crafting Prayers are Answered!

For a long time now I've been wanting to start woodworking. That is, I've been wanting to personally make a couple of only mildly challenging, functional pieces for my home, since I'm WAY too frugal to spend the $$ that furniture stores charge and not allowed to buy damaged pieces from our local discount shop (which are STILL overpriced, if you ask me--or Nick, which is why I'm not allowed). However, my woodworking experience is limited to the bench I made in high school shop class. It was good, but it was done under supervision of an experienced instructor, someone who would answer my (many) questions and not try to take over the project and do it himself. I do not live with someone who would do that, and I'm not interesting in starting a project, only to hand it over to my dear husband when he sees me doing something "wrong". That dear, dear, neurotic man. ;D Anyway, what I've really been needing, and keeping my back-of-my-mind's eye open for, is a step-by-step, visual, detailed, illustrated source with just the right information and designs to motivate me to go ahead and do it myself. I found that motivation today at http://www.oneprettything.com/ (I'm telling you, that site is awesome!!). And that motivation is http://www.knockoffwood.blogspot.com/
Things I hope to build sometime this spring:

I'd really like a box with storage (kind of like a chest, but really just a long wooden box) to put under the window in my bedroom, but I have a feeling that the first thing I made isn't going to be great, so I can absolutely use this bench. According to Ana, this should be pretty easy. Here's hoping!

AND for my kitchen/dining room, which is really small and cramped: the perfect sized table!! This will not be the first project I do.

This is actually an image from West Elm. Let's hope I can do something similar.
Similar is all I ask for here. Not better--heck, not even as good as!
One of the many great things about this blog is that she gives a time and cost estimate, which is super useful. I'm so so so so psyched!! I plan to get the wood for a project Monday.
I. AM. SO. EXCITED!!!!
I love this blog!!

Tuesday, February 9, 2010

Rhyl's "New" Jeans

Little Miss HATES jeans. She hates the seams, the waist band, the crotch and zipper, the material--and she freaks out every time she thinks I'm going to make her put on a pair. Everything about denim jeans rubs her the wrong way, quite literally, and she won't have anything to do with them. But some of her shirts look best with jeans, and I get tired of seeing her in sweats and leggings ALL. THE. TIME.

Last week Hubby came home early because he'd ripped out the rear in his jeans--a soft, worn-in pair that he liked because they were (light bulb!) SO comfy! I planned to make a simple pair of pants for Rhyl out of them, with a simple elastic waistband.
But the more I looked around as I was doing this project, the more ideas I got. I saw a perfect-fitting pair of leggings that had been stained up and bleached out and decided to line her new pants. I turned them inside-out so that there are absolutely NO seams rubbing on her anywhere.
I had a $3 roll of craft ribbon and a $2 belt buckle (I had already planned to make a belt for her, altho I don't know why because she never wears anything with loops!), and off I went! I also used the elastic from the leggings, so there was no cost there.
She now has a "new" pair of jeans that are lined because it's FREEZING COLD and SNOWY in Iowa right now, with a matching belt, and she LOVES them!! Score one for Mom brains!!! :D And they're extra-special, of course, because they were Daddy's jeans first. And perhaps sometime, tho maybe not today, I'll get a picture of them on the model--when the model isn't feeling so terrible-twosey.

Total Cost: $3 for ribbon (used nearly all 3'), $2 for belt buckle, free jeans, free elastic for waist, free leggings for lining, so.... $5 and about an hour, start to finish.

Seeing my girl in jeans without melting down: do I even have to say it??

Vegan Chocolate Chip Oatmeal Nut Cookies

Don't be afraid--these aren't as healthy or nuts-and-berries-y as the title suggests. And they are SOOSOSOOO GOOD!!! My friend Christine brought me a bag of Tropical Source dairy- and gluten-free semi-sweet chocolate chips (remember the dairy-free thing), which are very yummy by themselves, and this recipe was on the back of the bag. It says it's from recipezaar.com. It halves very well, as I proved last night. And then ate half the batch. :S

1/3 c almond butter or peanut butter
2 T canola oil
1 c sugar
1/3 c soymilk (I used rice milk)
1 t vanilla extract
1 c whole wheat flour
1/2 t baking soda
1/2 t salt
1 c rolled oats
1/2 c chocolate chips
1/2 c chopped macadamia nuts or walnuts

Preheat oven to 425F. Oil a large baking sheet (I use parchment paper every time, and they always comes out perfect! Err, well, you know...) Whisk together first 5 ingredients until very smooth. Combine flour, oats, baking soda, and salt separately, then add to the peanut butter mixture with the chocolate chips and nuts. Stir to combine. Drop batter onto baking sheet by large spoonfuls. Bake for about 8 minutes, or just until tops begin to crack (I went just a touch less than this and they were dreamy!). Let cool on sheet for 10 minutes, then transfer to a wire rack or plate. Or eat them as soon as they're cool enough to handle.

How can we tell that it's not just me--the least picky eater of the house--who loves these? Nick even liked them! He's a die-hard original chocolate chip cookie fan. That would be the version with eggs, white flour, butter, etc. A real manly eater, that one. If he thinks they're good, it's a safe bet that they'll please.

Monday, February 8, 2010

Procrastination

Lucky me! Most of the work was taken out of decorating my 2 y/o daughter's room when a friend's daughter decided she'd outgrown her Carebear decor. :D This is where Little Miss sleeps:

And this... well, this isn't something I'm beaming with pride over, but it's better than the Carebear printout that was in the frame. I didn't have stencils for the letters and my printer is on the fritz, so it is 100% free-handed, so I can't complain too much because it's legible! (It says, "rhyl".) This is one of three pictures that were gifted to us by our gracious friend Kristen, but it was just a little too aged. The frame was good, tho.

In a procrastatory move (is that a word??), I got out the scissors and put together a fun little name picture thingy. It's colorful and fills a space on the wall, and that's all I really wanted. Oh yes, and it kept me from doing my workout video. Another plus.

Saturday, February 6, 2010

Two for the Little Lady

When Rhyl catches me perusing any patterns or projects online, she often requests a dress. So I went thru my fabric stash, and pulled out a length of crumpled white satin that has moved with us at least once, if not twice, and my new Simplicity pattern (remember the cowgirl outfit?).

And now she has an angel dress. It's pretty plain, but she loves it. And that's the most important.

Oh yeah, and also important: I consider it a payment to myself to put this fabric to use, and the entire thing only took about an hour and a half.

Rhyl's [fun]ctional bathroom addition, which Mama is probably crazier about than she is, is a hair bow keeper, inspired by this post. I made it out of a $3 picture frame from the evil WM corporation (ugh, don't even ask me what I was doing there--someone PLEASE open a craft store in Keokuk!!!) and leftover fabric from my shower curtain.

It would have been cute with satin ribbons, but I had these fabric straps on hand from the shower curtain.

I do have a feeling that I should have really shellacked this down, because I think it'll be pulled on enough to need repair. But we'll cross that bridge when we get to it. Cost: $3 and fabric scraps. PS-- I included this pic of the back so that you can see how I put it together. And I stuck it on the inside of the bathroom cabinet with a couple of leftover 3M stickers.

Bea's First Photo Shoot

I have a goal. This is a big goal. I'm not actually sure yet if it is realistic, but I think about it a lot. It has something to do with having a booth at a very large midwestern settlers show here in SE Iowa in a couple of years. That's as specific as I'll be. :) Except, I'll also say this. I'm starting now on my inventory, because if this goal is ever realized it'll be a BIG one, and the amount of work that it will need is HUGE. So I'm starting now.
My first apron for my big goal.


The costumes I'm going to work on will be 1800s era, and will be focused more on the salt of the Earth folks than the sensational. I'm still not sure what all I'm going to have. It's going to take a lot of time, and a lot of creative investment. Once in a while, if it continues to go how I hope it will, I'll update you here. I am afraid, however, that I'm jinxing myself by letting the cat out of the bag. Seems like whenever I talk about something, it tends to disintegrate. :(


Anyway, wish me luck! OR, just don't talk about it at all in order to minimize further jinxing. :P

Beatrice is Born

Because I'm a little sensitive about birthing pictures, and because there quickly comes a point when you're wrapped snugly in tape that your instincts start screaming for freedom, we don't have any "during" pictures.

"Before" pictures, which I also won't bother with, would include a broken lamp, three bags of fabric scraps that came in my old-lady-quilter's sewing stash (from an estate auction a few years ago), two rolls of wide masking tape, an old T shirt, and a small plastic plate (for stability within the form).
And here she is. Beatrice.

My darling husband helped out immensely. Thanks, Honey! Couldn't have taped up myself straight without you!

Wednesday, February 3, 2010

So I Was Wrong

Apparently I am still on a creative streak.
Not bad news, right?!

Remember those *should-be-easy* Frederick's tops I talked about? I thought I'd try my hand at making one for myself. The should-be-easy part gets a little tricky when you don't have a pattern, you've never made one in an adult size, and you're too lazy to go downstairs and get the shirt to hold up to the fabric for size reference. (Anybody else do that? "I'm here, I'm mostly ready, let's just get to it!") But all in all, considering that this was made purely as practice and actually turned out pretty cute, I can't be too unhappy with it! Even tho I'm not exactly tickled pink.

I also found a good use for those Christmas/bday cards that I never want to throw out, due to the fact that they're good heavy card stock. Stencils! I think I got the bird pattern from Googling "bird silhouettes". It was a leftover from painting Gus' wall (that's somewhere on the blog).
First of all, it was much too plain because I couldn't be bothered with the open shoulders this time around. But the paint colors didn't turn out how I wanted. I was going for dark brown, and when that didn't work out (hmm, probably could have tried a second coat?? big duh) I thought it would look better sparkly. But that added a sort of blue tint to it, so I guess I got the wrong color of clear sparkly paint. Clear is not "clear" after all. Ya learn something new every day, huh? But when it was all said and done, I ended up with a decently cute new peasant top. Not bad for no pattern, no exact measurements, no guidelines... just not bad.
AND it has irony. Anybody who knows me has probably heard, because I talk about it way too much...
I hate birds!! lol It's not that I think they're ugly (well, not all of them). They just gross me out.

I do hope to make something similar (but hopefully better) soon. Even going into it blind, this is an incredibly easy, kind of hard-to-mess-up project for the beginner/intermediate sewist.